In this post, we will learn- How to download and install GIT on windows and how it works. Also we will create remote repository on GitHub and how to push our changes on that. How to create a branch and merge them into mater. We will also learn all basic GIT commands and its operations.
Table of Contents
GIT:
GIT is a distributed version control system (DVCS) or source code management system. It is an Open source.
Version Control System is a software that helps to developer to maintain their work. It handles all things like merging different files and maintaining different versions.
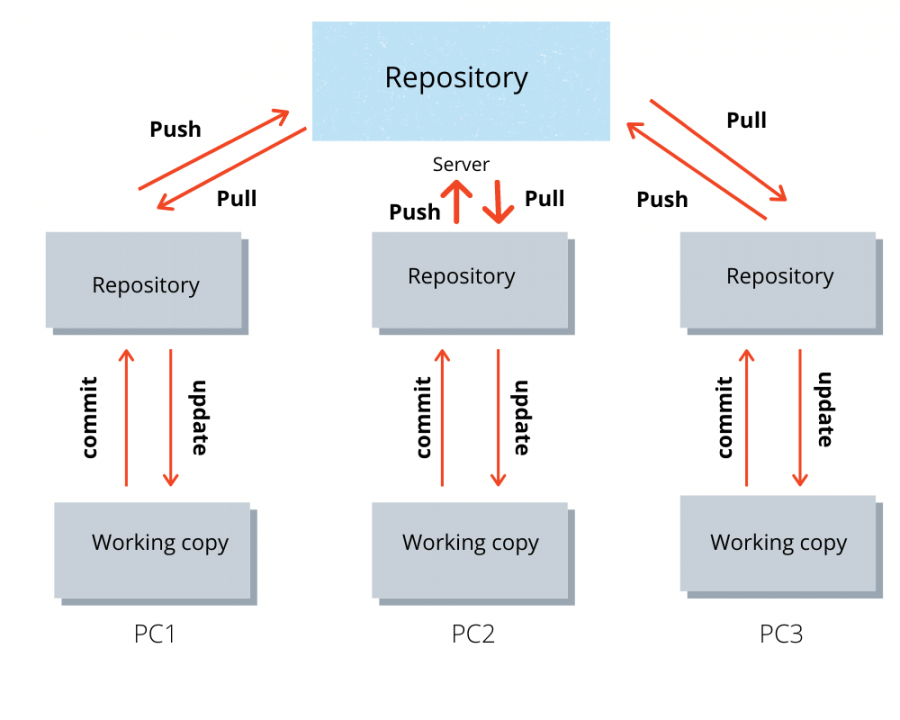
Why GIT is called Distributed Version Control System?
In distributed version control system, everyone can keep local copy of their work on local computer, which is called local repository. Everyone can commit, branch and merge locally Server keep one copy which is called remote repository.
DVCS doesn’t require an internet connection, so most development except pulling and pushing, can be done while travelling or away from home.
How GIT works:
In below image you can see in right hand side working copy which is actual copy of code/files/folder. Once it is ready we need to add these stuff into staging area (staging area is a draft space where we store our different version of files that we want to save for out next commit).
Once we added files into staging area, we will commit all changes into local repository from staging area. (Local repository is on our local computer). If everything is done till commit, now we can push our code to remote repository.
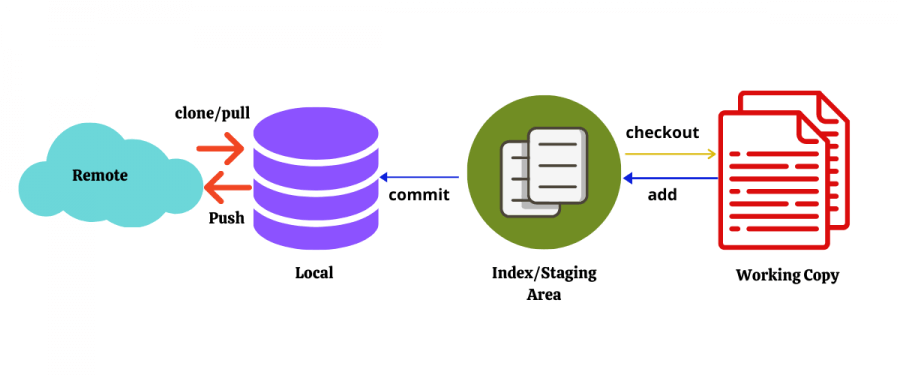
Below commands used in above process –
git add <fileName> – Adding code/files/folder onto staging area
git commit -m “Comment” – commit changes onto local repository
git push – Push the changes on the remote server or remote repository
git checkout – This is used to switch the branches in a repository
Download and Install GIT on windows –
To check git is install or not-
Open cmd –> type ‘git —version’
Click here to Download GIT
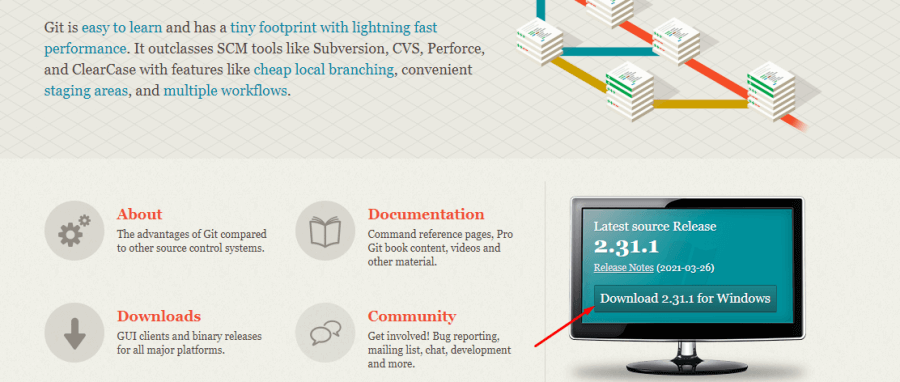
After downloaded it you can install it by clicking on next –> next button. No need to change anything.
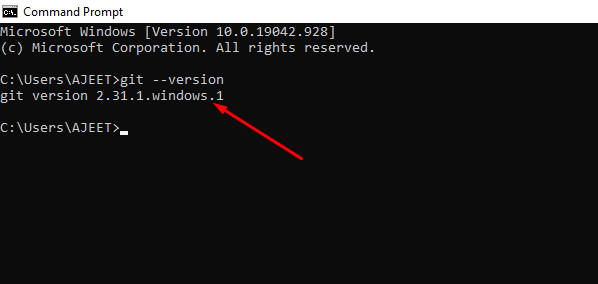
Again open command prompt and verify it is installed or not.
Command – git -–version
You can see below git version.
Create Folder and Perform git init command –
This command (git init) is used to create new git repository or it can be used to convert new project, unversioned project into git repository. So usually this is first command you will run for a new project.
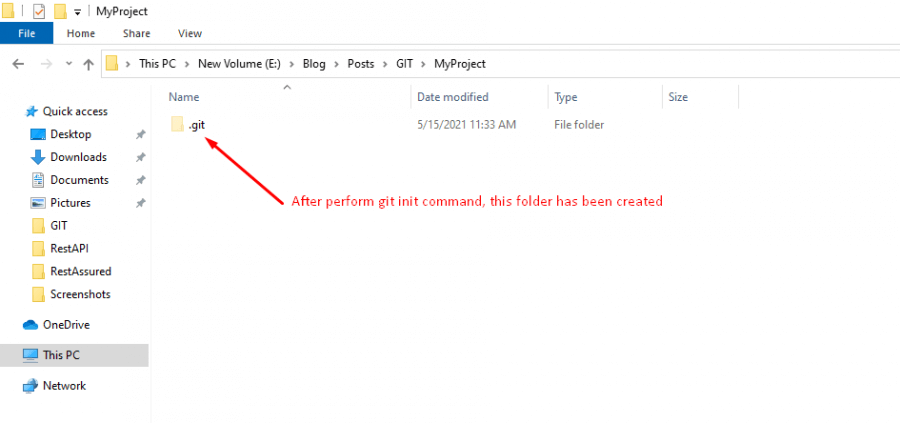
In my case, I have created a folder ‘MyProject’ and perform git init command to initialize the git.
- Open cmd.
- In command prompt Go to path till MyProject folder
- Type –> git init
It will create a .git folder which is known as git repository . See in below image
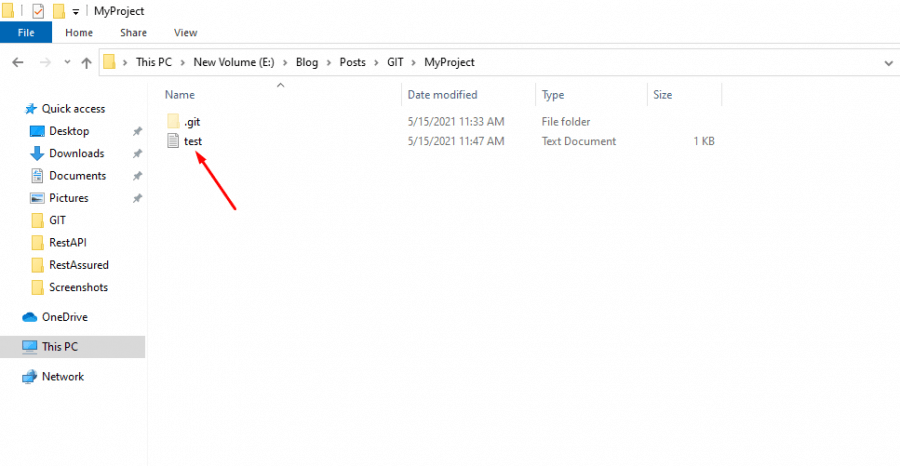
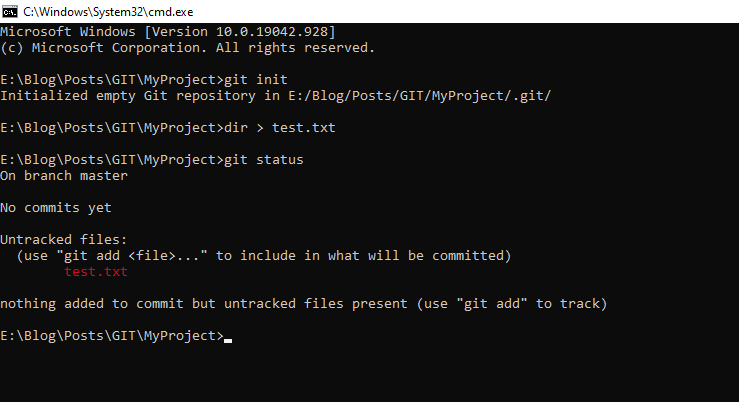
Now I will create an empty file in ‘MyProject’ folder using below command.
Command – dir > test.txt
It will create a file. See in below image-
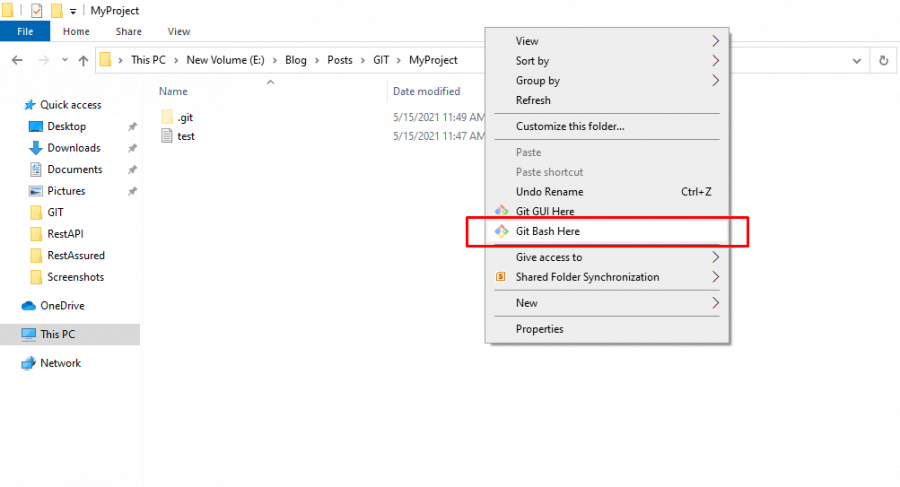
Now open Git Bash and go to ‘MyProject’ path.
OR second way go to inside ‘MyProject’ folder and right click –> Click on Git bash here
It will open the GIT bash in MyProject folder.
Now using command git status we can check above created file (test.txt).
Command – git status
See in below image it is showing test.txt file is untracked file which we need to add and commit it.
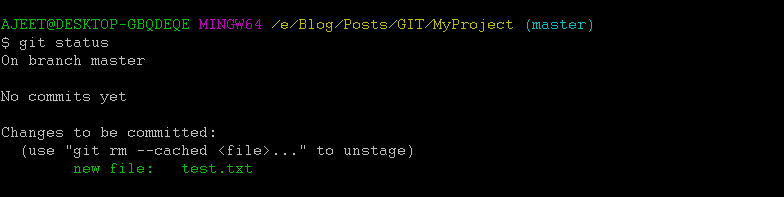
For adding it into staging area use below command
Command – git add <filename>
Now check using – git status. It will show in green color.
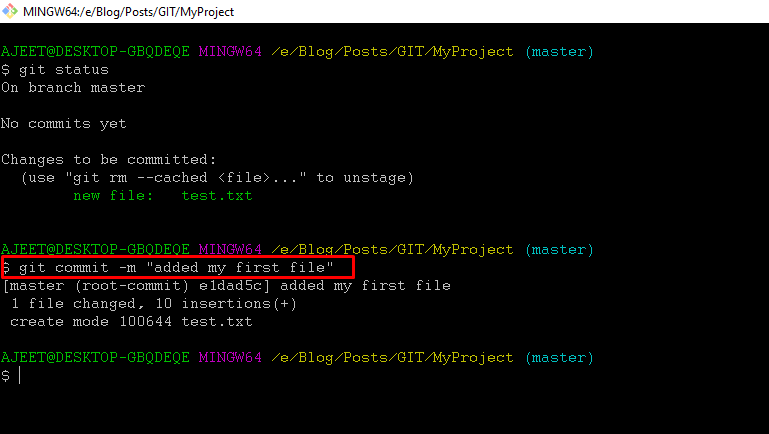
Now time to commit the file into local repository.
Command – git commit –m “commit my first file”
Remember –
As of now we have used below commands in GIT –
- git init
- git status
- git add
- git commit -m “…….”
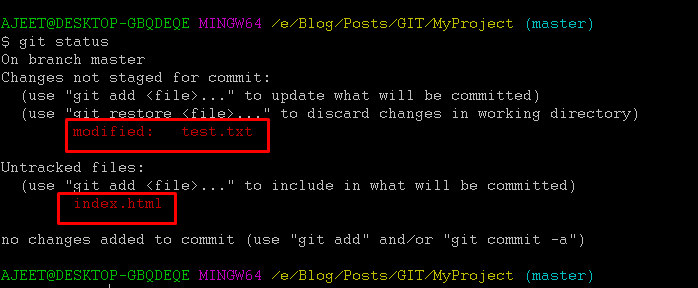
Let’s modify in test.txt file and also create a new file in MyProject folder.
We will modify the file manually and create new file index.html using below command.
Command – dir > index.html
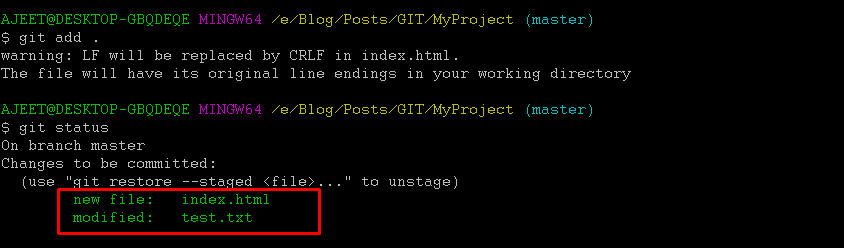
After done all above activity, again we will perform git status command. You can see in below screen, it is clearly showing that one file is modified and one file is untracked (for which we have created) so again we need to add this. Use below command to add both files at once.
Command – git add .
Check status using- git status
Now commit it using below command.
git commit –m “added intex.html and modified text.txt ”
Command – git diff ‘FileName’ – It shows the difference between working directory and local repository.
- Create a file in working directory, write something in this , save it and commit it into local repository.
- Now change the content or add something in this file in working directory.
- Now using git -diff fileName command we can see what are the differences between local and working directory.

In above screenshot , I have created a file and committed into local repository.
Now I will change/add something in file in my working directory and apply git diff command.
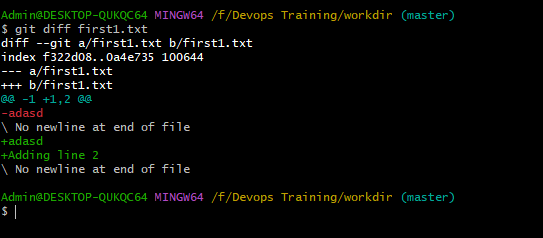
Now you can see, after apply git diff first1.txt , in green it is showing what I have added.
+++b/first1.txt – here plus sign (+++) is showing something I have added.
GitHub
In simple word, GIT hub is a website to upload your repository online. Also provides backup of your work.
Now we will see GitHub where we can store our code/file/folder on remote so we can say it is a remote repository which also provides the user interface.
First you need to sign up on this link – https://github.com/join
After successful signup, verify it from email then login it.
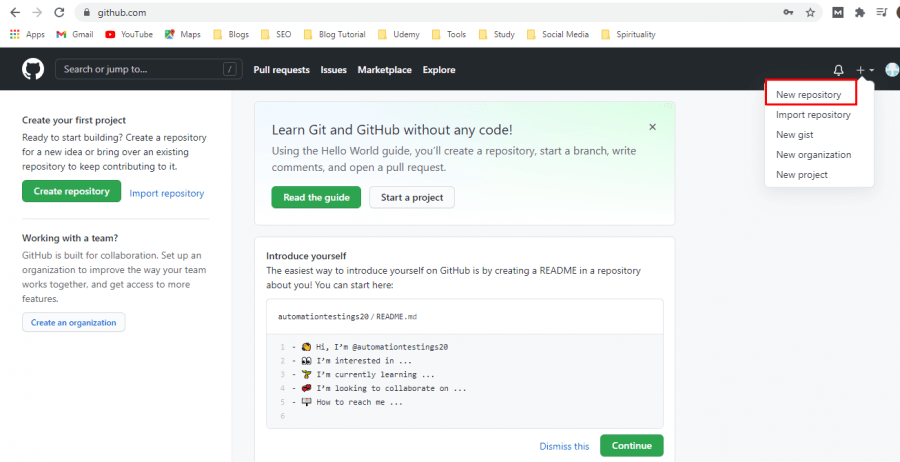
Create New Repository in GitHub –
- After login we will create new repository by clicking ‘New Repository’ link.
2. Enter Repository Name and click on Create Repository button.

3. After creating new repository, the screen is look like below.
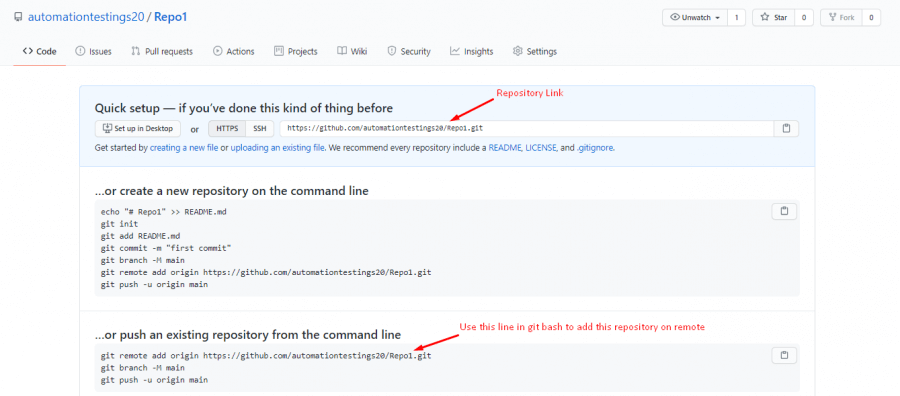
Now use below command to add location of your remote repository where you wish to pull and push your files.
git remote add origin <your repository link>
In my case it is like below-
git remote add origin https://github.com/automationtestings20/Repo1.git
Now we need to push it on remote using below command.
git push command-
git push –u origin master
While pushing first time it will ask you github username and password.
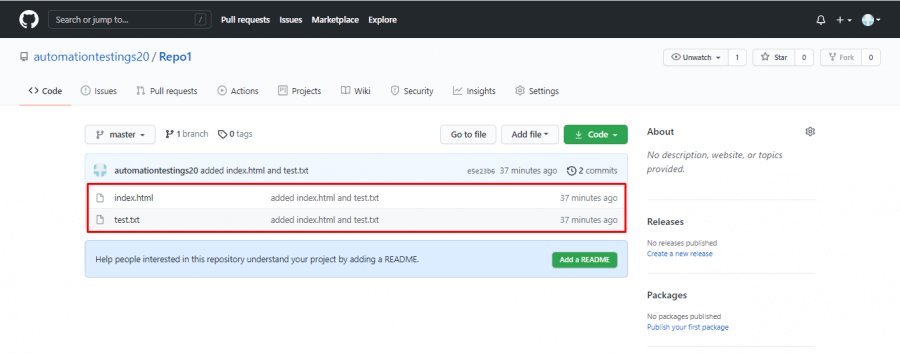
Now after giving username and password, refresh github url and you can see both files index.html and test.txt in below screen.
Use can use git log command to check all activities what we have done until.
All Important GIT Commands –
- git init
- git status
- git add
- git commit -m “Enter your comment here”
- git remote add origin <your repository link>
- git push –u origin master
- git log
- git –help
So this is how you can use all these commands and add files to your repository.
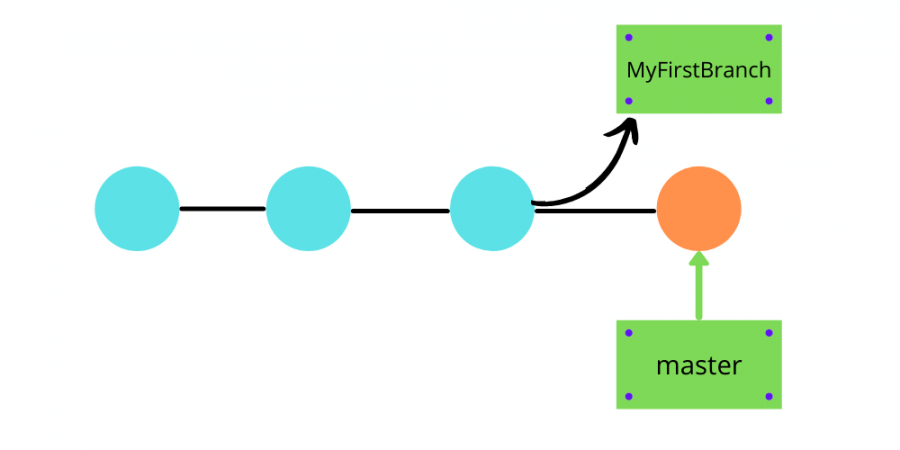
Branching and Merging In GIT
What is branching in GIT?
If we want to add some new feature or develop new code we should always go for new branch creation. In this operation my development moves into different line.
It is not recommended to do all changes into main branch or master branch. It is recommended to create a new branch for yourself, checkout that and do all changes in that branch and after testing and validating when everything is fine, we can merge those changes into main or master branch.
So that is why we create branches in GIT.
How To Create branch in GIT?
I have already created a branch which is master branch. Now we will create a new branch for adding some changes. [With the help of above section you can create a remote repository on GitHub]
Step 1: Create branch using below command.
Command-
git branch <branch name>
Open Git bash and got to where you have created your project folder and initialize the git and type above command.
See in below image.
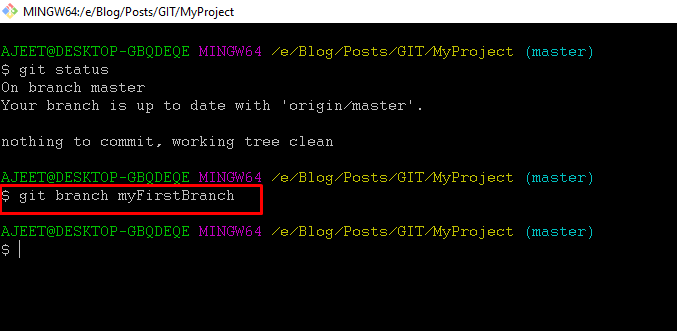
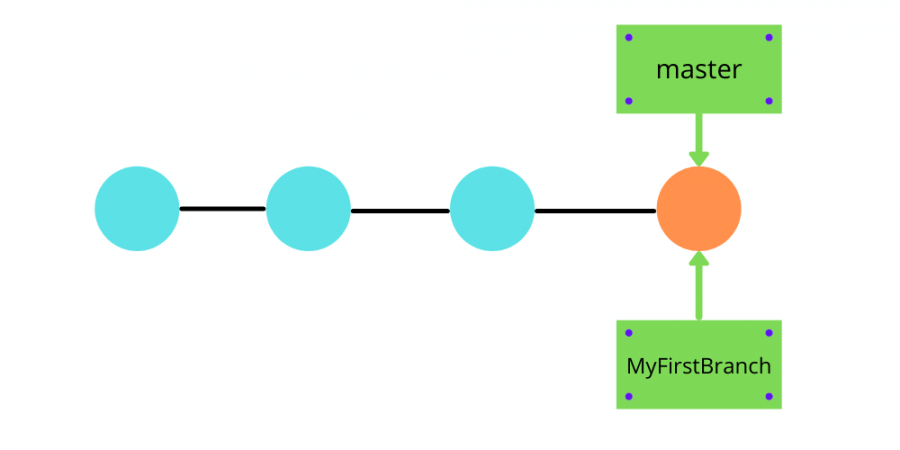
After creating new branch we are still on master branch. So if we want to start working on new created branch first we need to move on this. In below image we can see we are still on master branch.
To start work on new branch we have to checkout it.
Step 2: Checkout branch using below command.
Commands-
git checkout <branchName>
See in below Image.
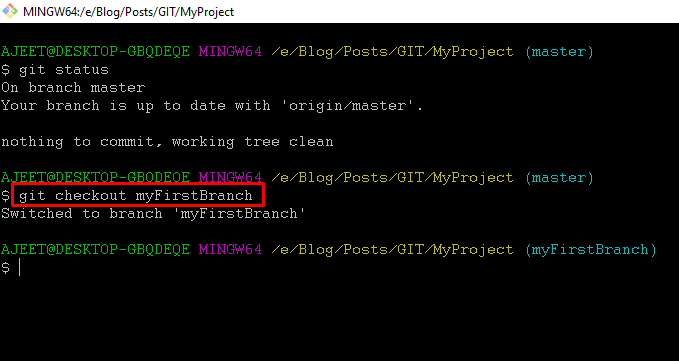
Now our status is like below. We are on new branch.
Let’s do something on new branch. Create one text file and commit it on new branch.
Command –
touch test2.txt
Now add this file to staging area.
Command-
git add .
Now we will commit this file to local repository.
Command-
git commit –m “commit file on new branch”
Now we will push the file on remote repository.
Command-
git push –u origin myFirstBranch

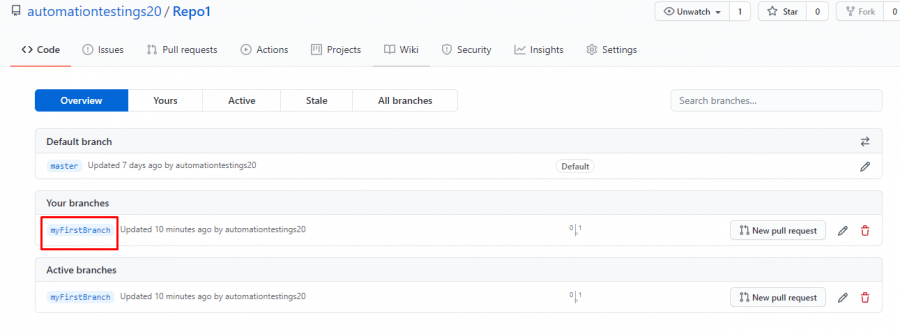
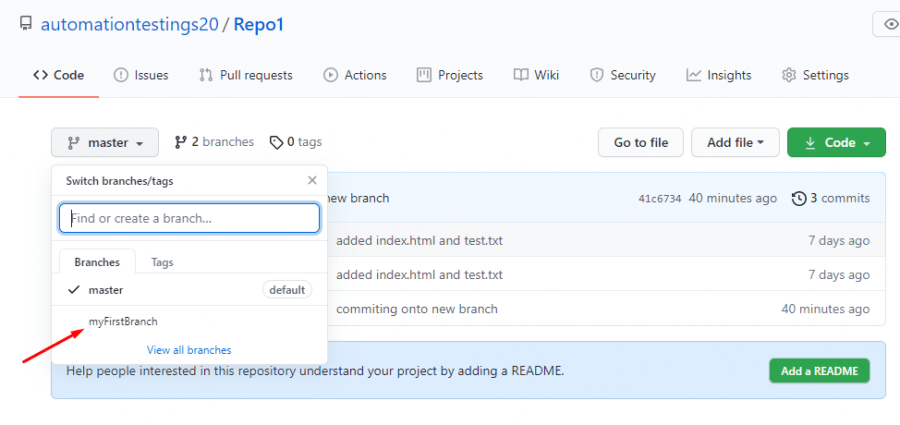
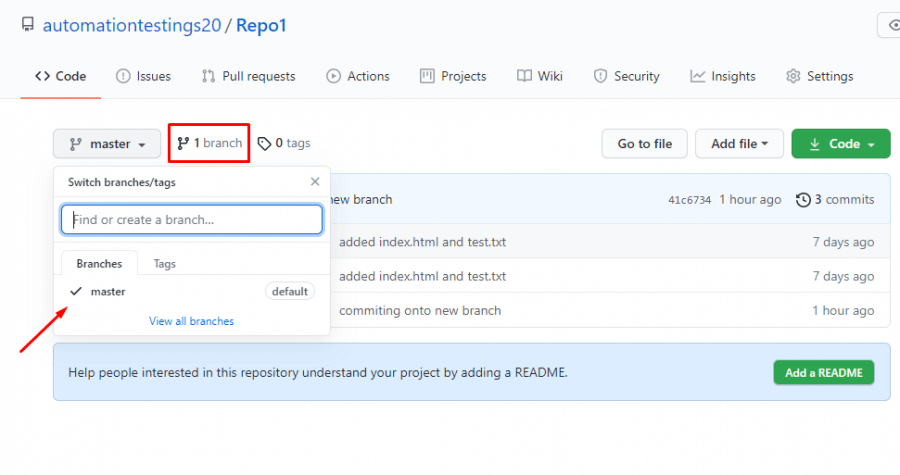
See in below image. Now my branch is visible.
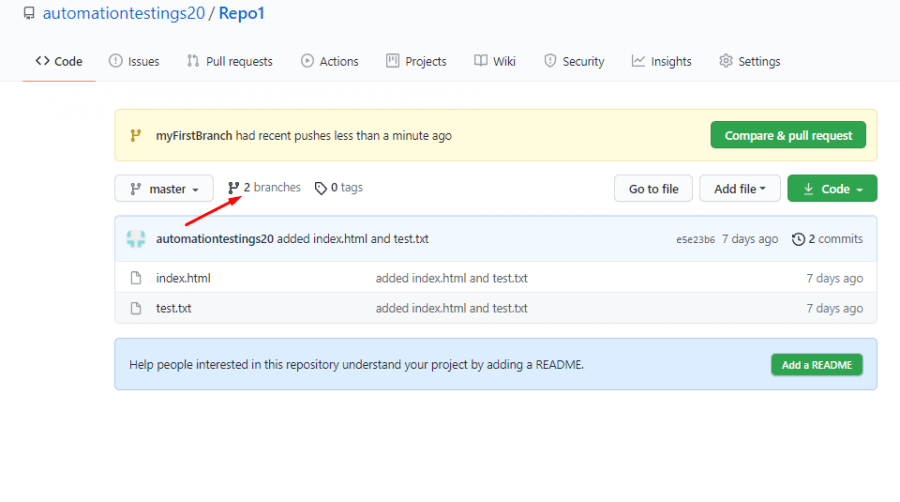
Click on branches and you can see new branch name. After click on this you can see what we have done in this branch.
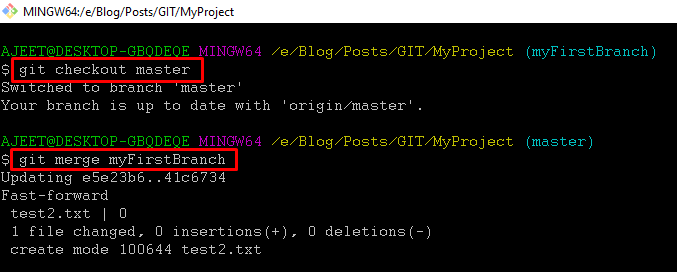
Step 3: Now time to merge our branch into master branch. So before merge our branch into master, first we need to checkout master branch.
Command –
git checkout master
Now merge it.
Command –
git merge myFirstBranch
But after merge the newly created to master we cannot see your changes into master.
See below image. In master branch it is not showing test2.txt file. Because we just merge the both branch.
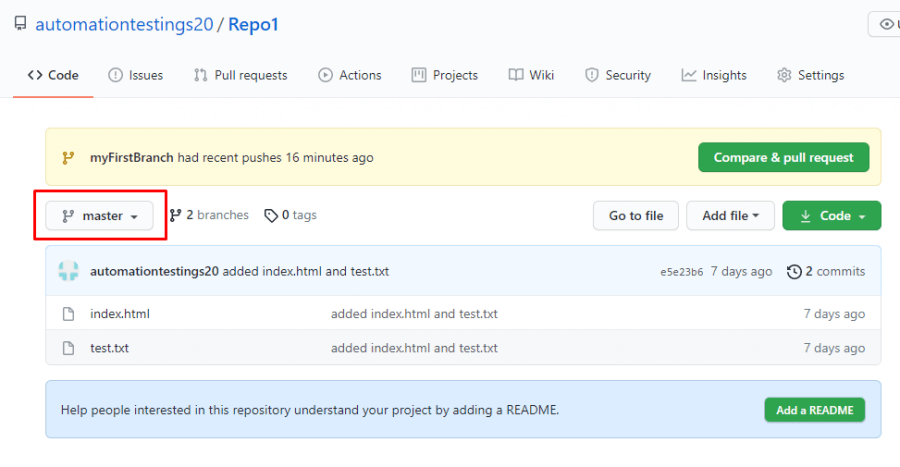
We have to push the changes for showing it into master branch.
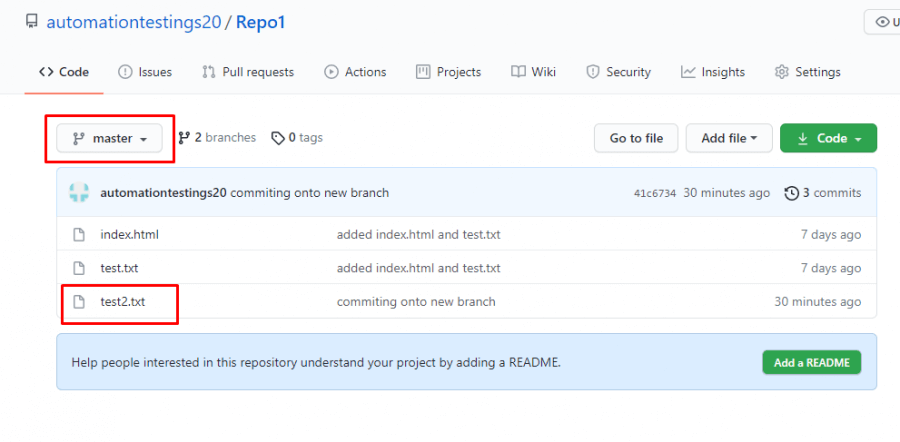
Command-
git push –u origin master
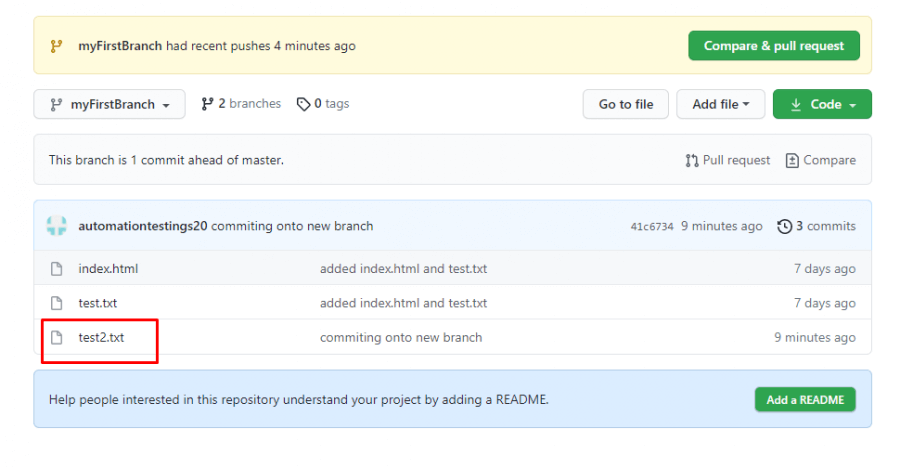
See in below image now test2.txt file is visible.
Deletion of the Branch –
After merge and push the changes on master branch in above section there is no longer needed newly created branch so we can delete that branch.
Commands-
git branch – d <branchName> -This will from local. At this stage you can see in below image branch is still present on remote repository.

At this stage you can see in below image branch is still present on remote repository because it is deleted from local repository.
Commands for delete from remote –
git push origin –delete <branchName> — This will delete from remote.

See in below image now it is deleted from remote repository.
Summary:
In this post you have learnt about ‘How to download and install GIT on Windows’ and how it works.
How to perform different git commands in real time scenarios.
How to use GitHub repository to store the changes.
How to create branch and merge into Master branch.
I am sure this content added some additional value in your skills and also helpful to preparation of your interviews.
Final word, Bookmark this post “GIT Commands Tutorial for Beginners” for future reference.
If you have other questions or feedback, the comment section is yours. Don’t forget to leave a comment below!
Must Read: